Configuration
Pay by Link Configuration
On this page you can set a template for all your payment links that you send to your customers
Video Tutorial
Watch the guide on youtube here:
Configure Pay By Link: click here
Open Pay by Link Configuration screen
-
Select the Settings option from the top Main menu bar. The Settings menu bar displays, with the Users open by default.
-
__Click on the Payment configuration menu option. The Payment configuration settings screen displays.
-
Click on the Pay by Link Configuration link. The Pay by Link Configuration page displays.
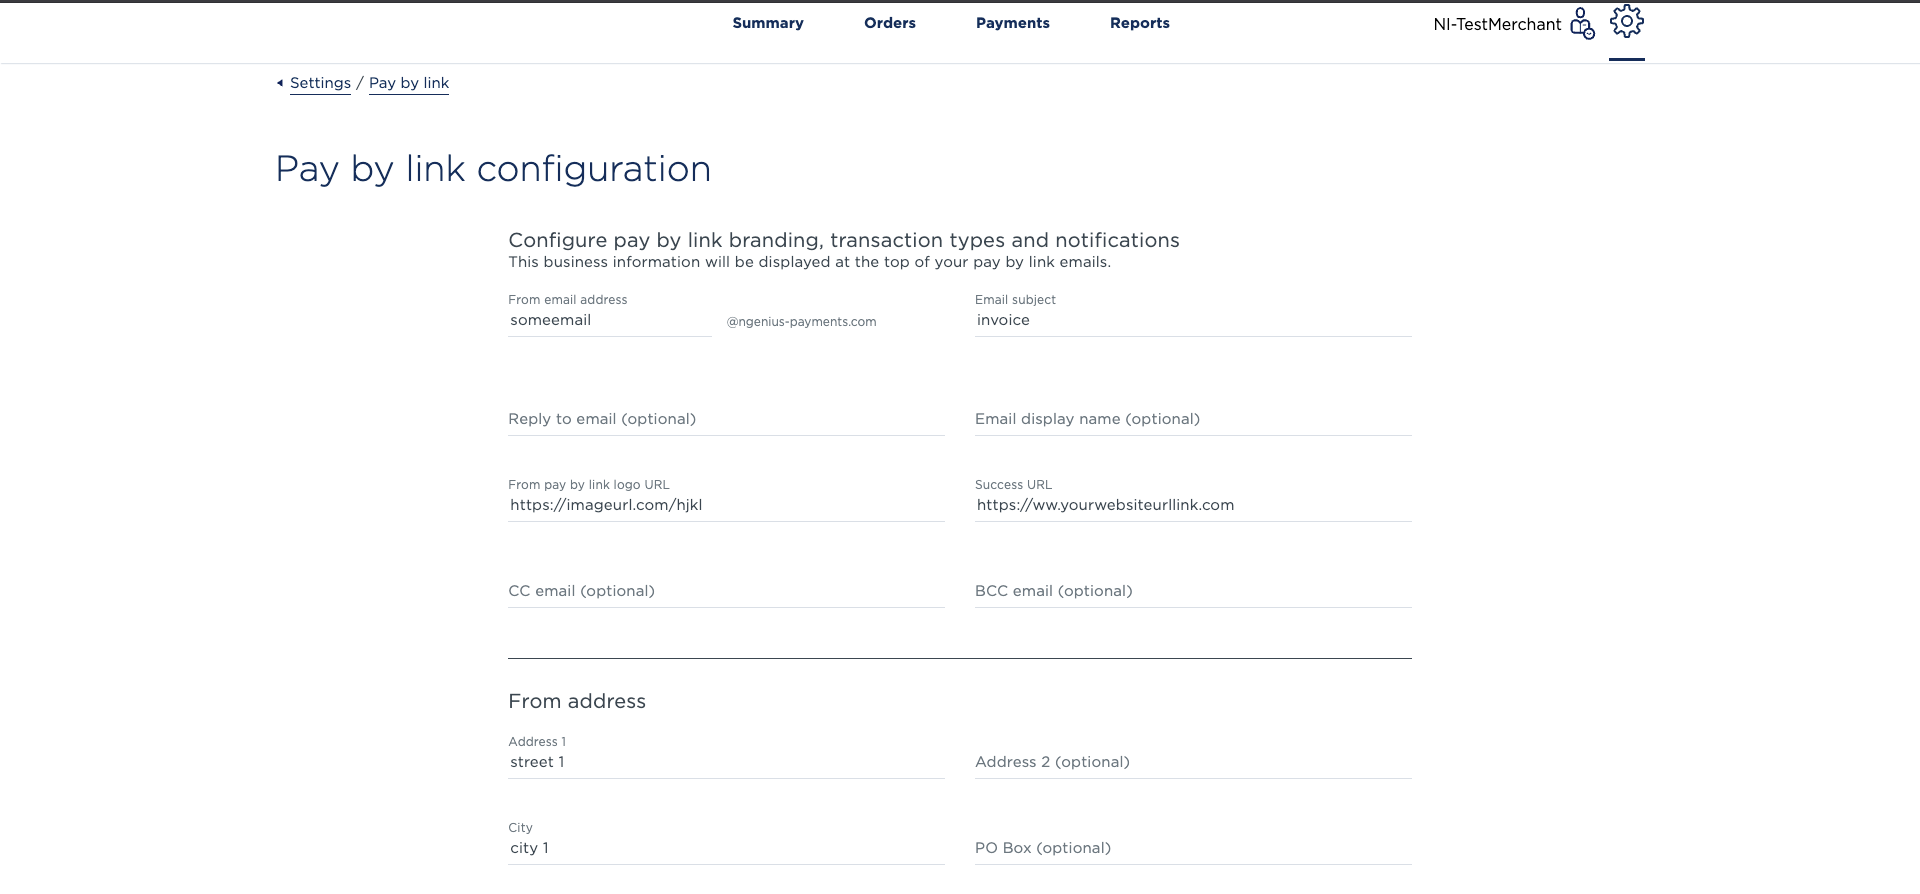
Pay by Link Configuration
Use the following fields to customize the email settings for sending payment links to your customers:
- From Email Address: Enter the email address from which the payment link will be sent.
- Email Subject: Define the default subject line of the email, such as “Bill Payment Details” or “Invoice Information.”
- Reply-To Email Address: Specify the email address that customers can reply to when they receive the payment link.
- Email Display Name: This is the sender name that appears in the customer's inbox. Typically, this should be your business name for recognition and trust.
- Pay by Link Logo URL: Provide the URL of your company logo to be displayed on the hosted payment page.
- Success URL: Enter the link to which customers will be redirected upon successful payment—commonly your website homepage or a confirmation page.
- CC Email Addresses: Specify any email addresses that should always be included in CC when payment links are sent. These will be auto-populated for each new payment link.
- Business Address: Enter your official business address. This will be included in the email that customers receive.
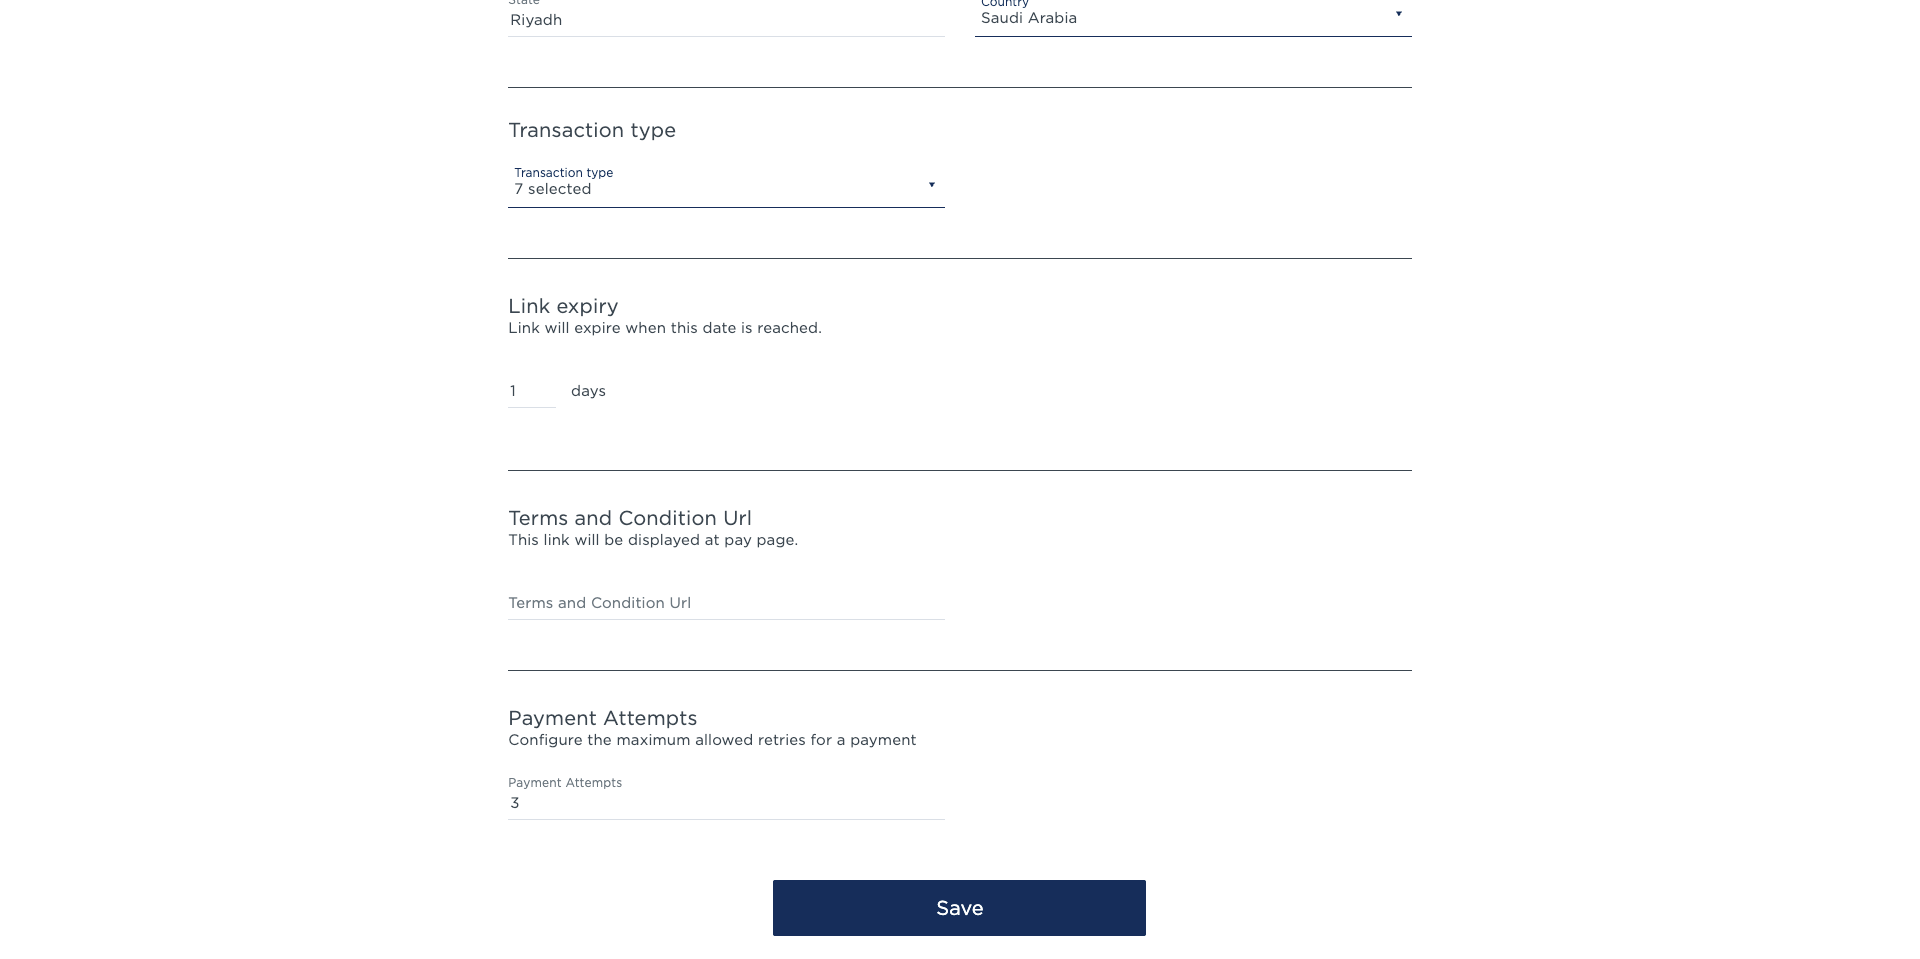
- Supported Transaction Type: Choose the type of transactions you wish to allow (e.g., Purchase, Auth, Recurring etc.). Use the dropdown menu in the Supported Transactions field to make your selection.
- Link Expiry: Set the number of days after which the payment link will expire. This expiry time will also be mentioned in the email to inform the customer of the payment window.
- Terms and Conditions URL: If applicable, provide a URL pointing to your business's Terms and Conditions. Cardholders will be required to check a box acknowledging the terms before clicking “Pay Now.”
- Payment Reattempts: Set the maximum number of payment attempts allowed per order (up to 5). This feature allows customers to retry failed or declined transactions using the same link, including 3DS failures, without merchant intervention. You can track the number of attempts in the order history. Also note that Recurring payments will not allow any reattempts.
Updated 28 days ago